Flashing LEDs
core
radio
microphone
basic.forever(function () {

})
Step 0 @showDialog
Hello! In this tutorial, you’ll learn to control the external LEDs with your Micro:bit!
Step 1 @showDialog
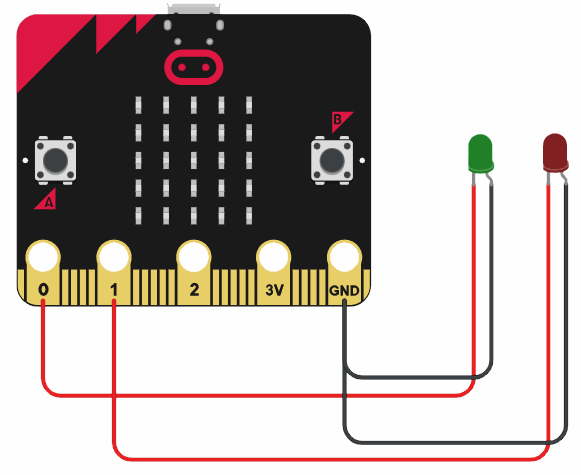
Before we start, let’s make sure that your LEDs are connected to the Micro:bit as shown in this schematic:

Step 2 @showHint
Turning LEDs on
First, find the ||pins.digital write pin|| block in your toolbox under the ||pins.pins|| category and place this block inside the ||basic.forever|| block.
This is what it looks like:
pins.digitalWritePin(DigitalPin.P0, 0)
Step 3 @showDialog
The Micro:bit has 25 external connections on the edge connector of the board, which we call ‘pins’.
There are five large pins that are also connected to holes in the board labelled: 0, 1, 2, 3V, and GND. The ||pins.digital write pin|| block can be used to turn the LEDs connected to the pins on your Micro:bit on and off.
Step 4 @showHint
Turning LEDs on
Let’s turn the green LED on! Change the value inside the ||pins.digital write pin|| block from 0 to 1.
basic.forever(function () {
    pins.digitalWritePin(DigitalPin.P0, 1)
})
Step 5 @showHint
Turning LEDs on
The MakeCode simulator has no idea whether your Micro:bit has LEDs connected, so it doesn’t display them. Let’s download your program to check if they light up!
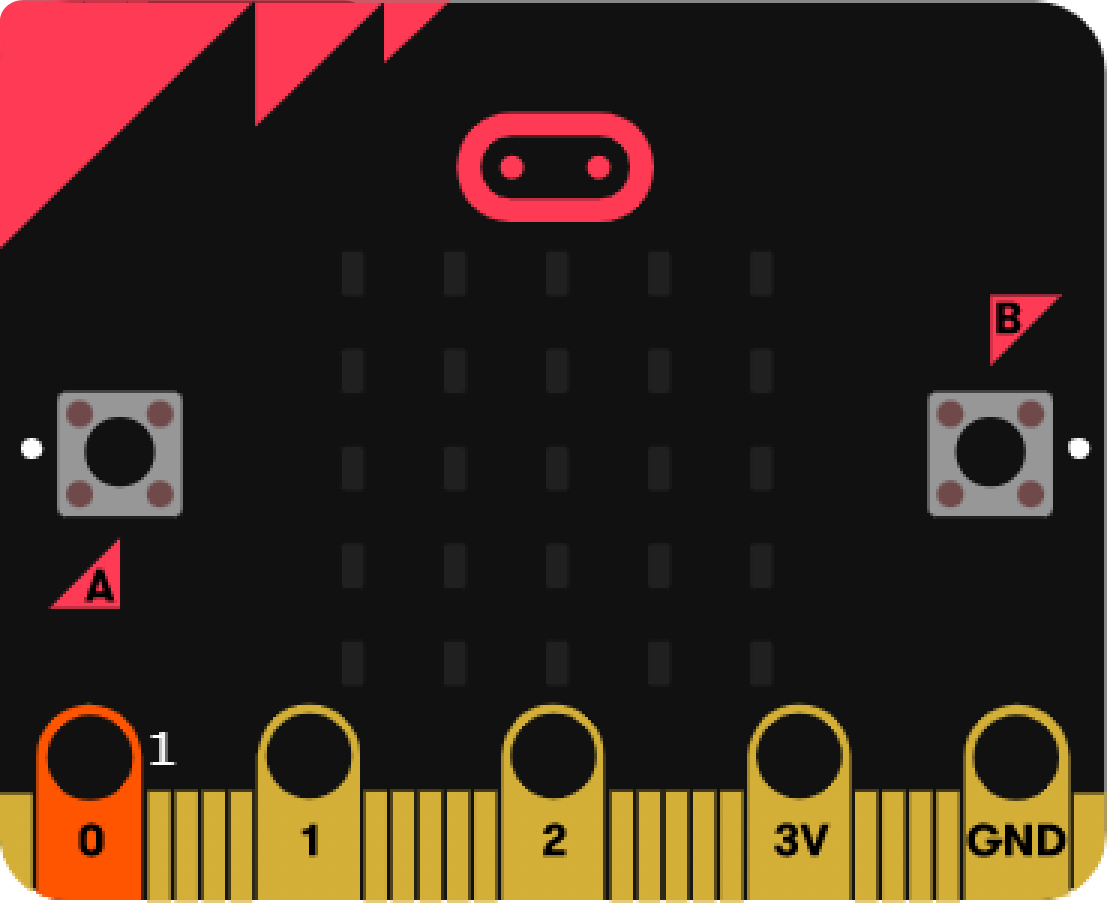
As you can see, the pin labelled `0` is now highlighted.
That means that your Micro:bit is now putting out power through this pin.

Step 6 @showHint
Flashing LEDs
Now, it’s time to make our LED flash! Modify the code as shown to make the Micro:bit turn pin 0 on and off repeatedly, then download your code to Micro:bit.
basic.forever(function () {
    pins.digitalWritePin(DigitalPin.P0, 1)
    basic.pause(500)
    pins.digitalWritePin(DigitalPin.P0, 0)
    basic.pause(500)
})
Step 7
Challenge
It’s time for a challenge! Your task is to modify the code to make 2 LEDs blink at the same time.
To make both LEDs blink, you need to forever:
- Turn the pin 0 on,
- Turn the pin 1 on,
- Wait for a time,
- Turn the pin 0 off,
- Turn the pin 1 off,
- Wait for a time again.
Step 8
Do it yourself
Now use everything you’ve learned today to program a version of traffic signals. Make the lights switch from red to green and back again using the buttons!
Answers @showDialog
Answer: Challenge
basic.forever(function () {
    pins.digitalWritePin(DigitalPin.P0, 1)
    pins.digitalWritePin(DigitalPin.P1, 1)
    basic.pause(500)
    pins.digitalWritePin(DigitalPin.P0, 0)
    pins.digitalWritePin(DigitalPin.P1, 0)
    basic.pause(500)
})
Answer: Do it yourself
Your code can be something like this:
pins.digitalWritePin(DigitalPin.P1, 1)
input.onButtonPressed(Button.A, function () {
    pins.digitalWritePin(DigitalPin.P1, 0)
    pins.digitalWritePin(DigitalPin.P0, 1)
})
input.onButtonPressed(Button.B, function () {
    pins.digitalWritePin(DigitalPin.P0, 0)
    pins.digitalWritePin(DigitalPin.P1, 1)
})